
This is going to be your best mini recipe collection with snapper fish. Vermilion snapper has always been one of those fish that just speaks to me. Its flavor is subtly sweet and buttery, with a texture that’s tender yet firm enough to hold up to all kinds of cooking styles. I’ve spent so much time experimenting with it that I couldn’t possibly pick just one way to prepare it—there’s just too much goodness to uncover. That’s why I’m sharing four of my go-to snapper recipes, each with its own personality and vibe.
Whether you’re in the mood for something spicy and bold, a taste of Italy, or a dish that’s effortlessly elegant, these recipes will let the snapper shine in all the right ways. Ready to explore? Let’s get cooking!
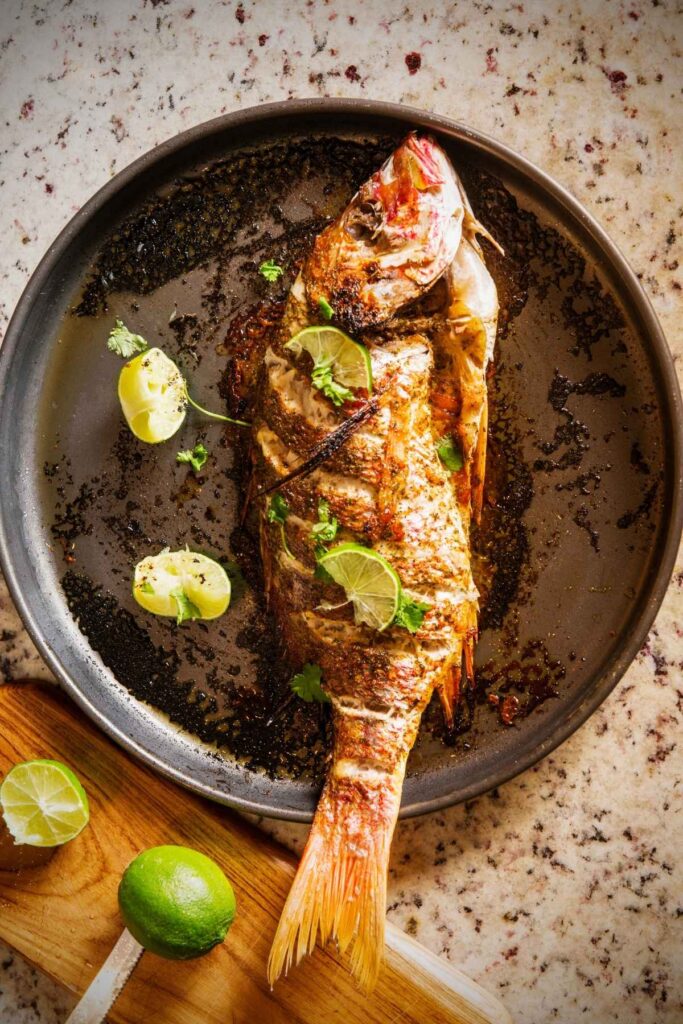
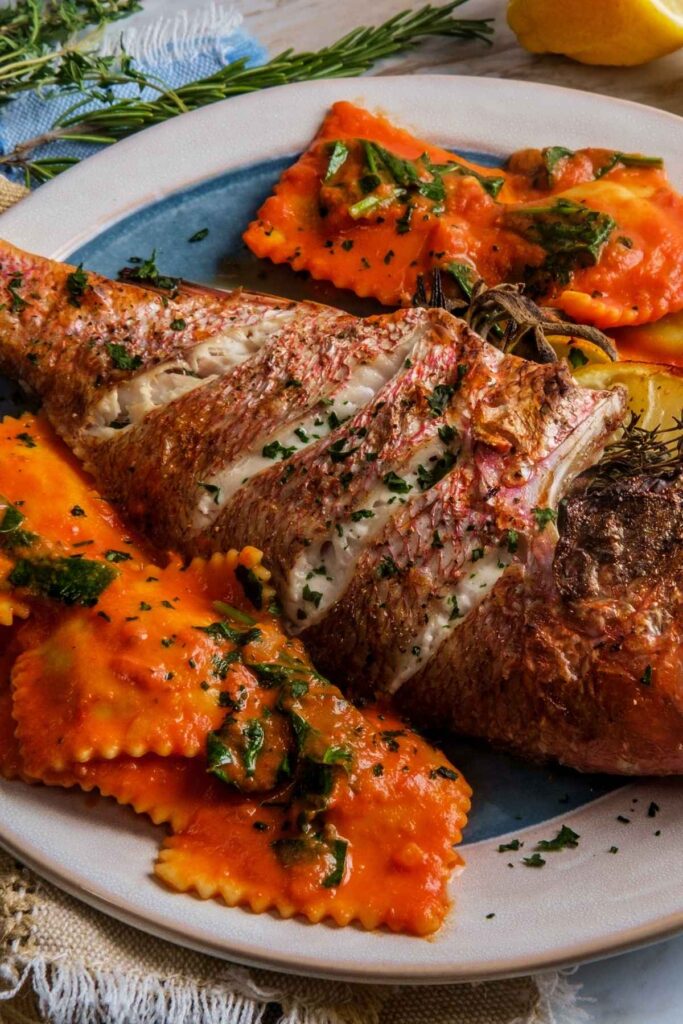
Vermilion Snapper al Forno (Italian Baked Snapper)
First of my favorite snapper recipes. There’s something magical about the simplicity of Italian cooking—quality ingredients speaking for themselves without the need for overcomplication. My journey with this Vermilion Snapper al Forno started years ago when I came across freshly caught snapper at a charming little market on the Amalfi Coast. Inspired by the traditional Italian way of baking whole fish, I made this recipe, making tweaks to it until every bite brought that perfect balance of flavors: bright, savory, and deeply satisfying, that’s how it should be. It’s now a family favorite, and I love how it turns every time; delicious to say it in one word.
Ingredient Notes and Substitutions
Vermilion Snapper: An obvious inclusion, Vermilion Snapper offers a delicate yet super flavorful meat that holds up beautifully when baked. Its sweet, clean taste pairs perfectly with other Italian ingredients, you will see how in the step-by-step guide. Look for wild-caught, fresh snapper with bright eyes and firm flesh. If it’s a sad day and you can’t find fresh snapper, don’t worry, it happens. You can substitute with red snapper or even sea bass for a similar texture.
Cherry Tomatoes: Love of every Italian cuisine lover, these little bursts of sweetness break down beautifully in the oven, creating a luscious sauce. Who doesn’t like sauce when having anything Italian? Choose vibrant red, ripe tomatoes for the best flavor. If you’re out of cherry tomatoes for some reason, Roma or grape tomatoes work as well, not as beautifully but they just do it okay.
Extra Virgin Olive Oil: The heart of Italian cooking, a generous drizzle elevates the flavor of the fish and vegetables. Opt for cold-pressed, high-quality olive oil with a fruity aroma. Look for extra virgin olive oil, and don’t get deceived by anything called pomace, we don’t do that here. Moreover, when making anything Italian, don’t skimp on olive oil—this ingredient makes all the difference.
Capers: Briny and bold, capers add a punch of flavor that cuts through the richness of the snapper. I like to use capers packed in brine rather than salt for a milder taste. If you don’t have capers, a few chopped green olives can work too.
Garlic: Aromatic and essential, garlic brings warmth and depth to the dish. Fresh cloves are non-negotiable; avoid pre-minced garlic for this one.
Fresh Oregano: The earthy, floral notes of oregano are quintessentially Italian, trust me on this one. Use fresh sprigs for a more vibrant flavor, but dried oregano can work if that’s what you have on hand—just use less.
Lemon: A squeeze of fresh lemon juice right before serving highlights the entire dish and keeps the flavors together beautifully. Always use fresh lemons, not bottled juice.
Shallots: Milder than onions, shallots melt into sweetness as they bake, creating a subtle depth of flavor. You can substitute with thinly sliced red onions if needed.
Step-by-Step Directions
Step 1: Preheat the Oven & Prepare the Baking Dish
Preheat your oven to 400°F (200°C). Lightly drizzle olive oil onto the base of a large baking dish to prevent sticking and add extra flavor. I like to rub the oil in with my fingers—it’s a simple ritual that sets the tone for the meal.
Step 2: Clean & Prep the Snapper
Rinse the snapper under cold water and pat dry with paper towels. Ensure the scales and fins are fully removed (your fishmonger should do this for you). Score the skin with two to three shallow cuts on each side. This helps the flavors infuse better and the fish cook evenly. I’ve learned over the years that skipping this step makes a big difference in flavor penetration.
Step 3: Build the Flavor Base
Scatter half of the cherry tomatoes, sliced shallots, and a few sprigs of fresh oregano across the bottom of the baking dish. This creates a delicious, aromatic bed for the fish to rest on while baking. Trust me—this simple layer elevates the sauce that forms naturally as the dish cooks.
Step 4: Season the Snapper Generously
Rub the fish inside and out with salt, freshly cracked black pepper, and a drizzle of olive oil. I always massage these in gently; it feels like showing love to the dish. Stuff the cavity with thin lemon slices, a couple of smashed garlic cloves, and a few sprigs of fresh oregano.
Step 5: Assemble the Dish
Place the seasoned snapper over the vegetable base. Scatter the remaining cherry tomatoes, shallots, and capers around the fish. Drizzle everything generously with olive oil—don’t be shy here, as the oil helps create a silky sauce.
Step 6: Bake Until Perfectly Tender
Slide the dish into the preheated oven and bake for 25-30 minutes, depending on the size of your snapper. You’ll know it’s done when the flesh flakes easily with a fork and turns opaque. Resist the urge to overcook; tender fish is the key to a perfect al forno.
Step 7: Finish with Freshness
As soon as the snapper comes out of the oven, squeeze fresh lemon juice over the top. The aroma alone will transport you to an Italian seaside village. Sprinkle a bit more fresh oregano for color and a burst of herbal flavor.
Step 8: Serve & Savor
Carefully transfer the snapper to a serving platter. Spoon the roasted tomatoes and shallots around it, along with the flavorful juices from the baking dish. I recommend serving this dish family-style with crusty bread to soak up the sauce. Watching everyone enjoy it with smiles makes every effort worth it.

Pro-Tips
- When prepping the fish, make shallow cuts along the sides of the snapper. This step isn’t just decorative—it allows the seasonings and aromatics to penetrate deeply, ensuring every bite bursts with flavor. Plus, it helps the fish cook more evenly. Skip this step, and you’ll miss out on the full potential of flavor infusion.
- Once your snapper comes out of the oven, resist the temptation to dig in right away. Allow it to rest for about 5 minutes. This brief pause lets the juices redistribute, keeping the fish moist and tender. Trust me, the wait is worth it—your patience will be rewarded with perfectly flaky, succulent bites.
Reheating and Storage Tips
Store the baked snapper in an airtight container in the refrigerator for up to 2 days. The fish will retain its flavor, but the tomatoes and herbs may soften slightly over time.
I don’t recommend freezing this dish, as the texture of the fish can become mushy upon thawing.
To reheat, place the snapper in a baking dish, cover it with foil, and warm it in a preheated oven at 300°F (150°C) until heated through (about 10-15 minutes). Avoid microwaving to preserve the texture.
Vermilion Snapper Piccata with Lemon and Capers
Next on my snapper recipes list is Piccata. The first time I tasted a classic Italian Piccata, it was a revelation. I was at a little trattoria in Rome, and the dish arrived with golden chicken bathed in a tangy, lemony sauce dotted with briny capers. It was simple yet unforgettable. That experience sparked my curiosity—what if I swapped the chicken for seafood? That’s where I thought of Vermilion Snapper.
Its firm and flaky texture made a perfect ground for those perfect flavors. After countless experiments in my own kitchen—adjusting the sauce, playing with the sear, and adding a touch of white wine for depth—I landed on a version that’s become a routine in my home. It’s such a special feel for a dinner party but also a mid-week meal. Every time I cook it, I take myself back to that little table in Rome with my own added touch.
Ingredient Notes and Substitutes
Vermilion Snapper Fillets: Fresh, skinless, and boneless fillets are best. I look for firm, bright flesh with a clean ocean smell. The snapper’s delicate sweetness balances perfectly with the zesty sauce we will make in the recipe. If snapper isn’t available, grouper or halibut can work, but nothing beats fresh vermilion snapper.
Lemons (Fresh): Ah, the soul of Piccata! I use both zest and juice here for a double punch of citrus. Fresh lemons are non-negotiable; bottled juice simply lacks the vibrancy. Look for firm, fragrant lemons with bright yellow skin.
Capers: These little briny pearls add a salty flavor. I always opt for capers in brine rather than salt-packed ones for a cleaner flavor. Rinse them gently before use to mellow out the intensity.
Dry White Wine: A splash of dry white wine adds depth to the sauce. I usually grab whatever I’m sipping—Pinot Grigio or Sauvignon Blanc works wonderfully. If wine’s off the menu, chicken broth with a dash of white wine vinegar makes a decent substitute.
Butter (Unsalted): Butter is what transforms the sauce into something silky and luxurious. I prefer unsalted butter to control the saltiness, and just a couple of tablespoons go a long way.
Olive Oil: You know I’m always generous with my good-quality extra virgin olive oil. It’s a kitchen must-have and plays a key role in searing the fish.
Garlic (Optional but Recommended): Just one or two cloves, thinly sliced. I find garlic adds a subtle warmth without overpowering the bright flavors of the dish.
Flour (for Dredging): A light dusting of all-purpose flour ensures a golden, crispy sear on the snapper. If you’re gluten-free, rice flour works well as a substitute.
Step-by-Step Instructions
Step 1: Prep the Fish
Pat the snapper fillets dry with paper towels. This is crucial for getting that beautifully golden sear. Lightly season both sides with salt and pepper. Dust with a thin layer of flour, shaking off the excess. I find this step gives the fish a perfect crispness without feeling heavy.
Step 2: Sear the Snapper
Heat a generous drizzle of olive oil in a large skillet over medium-high heat. When the oil shimmers, gently lay the fillets in the pan, presentation side down first. Cook for 3-4 minutes per side until golden brown and just cooked through. Don’t overcrowd the pan; do it in batches if needed. Transfer the fillets to a plate and cover loosely with foil to keep warm.
Step 3: Build the Sauce
In the same skillet, reduce the heat to medium. Add a splash of olive oil if the pan looks dry. Toss in the thinly sliced garlic (if using) and sauté for about 30 seconds until fragrant. Pour in the white wine, scraping up the browned bits from the bottom of the pan—this is where all the flavor lives! Let it simmer for a minute or two until slightly reduced.
Step 4: Add Lemon and Capers
Stir in the lemon juice, zest, and those beautiful briny capers. Let the sauce bubble gently for another minute. The aroma at this point is pure magic—bright, tangy, and savory all at once.
Step 5: Finish with Butter
Reduce the heat to low and whisk in the butter one tablespoon at a time. This transforms the sauce into a glossy, velvety delight. Taste and adjust the seasoning if needed. I usually add a pinch of salt here to balance the acidity.
Step 6: Return the Snapper to the Pan
Nestle the seared snapper fillets back into the sauce, spooning some of that liquid gold over each piece. Let it simmer gently for 1-2 minutes to rewarm the fish and let the flavors meld.
Step 7: Serve with Love
Transfer the fillets to a serving platter, pouring the sauce over the top. Sprinkle with extra lemon zest and a few capers for presentation. I love serving this with buttery linguine or a simple arugula salad—it feels fancy but approachable.
Pro-Tips
- Before searing the snapper, allow the fillets to sit at room temperature for 10-15 minutes after patting them dry. This helps prevent the fillets from releasing excess moisture when they hit the pan, resulting in an even better golden-brown crust. Cold fish straight from the fridge can lead to steaming instead of searing.
- For an extra punch of flavor, add a teaspoon of caper brine from the jar to the sauce while simmering the lemon and wine mixture. This subtle addition deepens the savory complexity without overpowering the delicate flavors of the snapper.
Reheating and Storage Tips
Store the piccata in an airtight container in the refrigerator for up to 2 days. The lemon-caper sauce will keep well, but the fish is best enjoyed fresh to maintain its delicate texture.
Freezing is not recommended, as the sauce may separate and the fish can lose its tenderness.
Reheat gently in a skillet over medium-low heat, adding a splash of water or broth to the sauce to prevent it from drying out. Heat until warmed through, but avoid overcooking the fish.
Grilled Vermilion Snapper with Italian Herb Marinade
Third on our list of snapper recipes is this delicious grilled Vermilion with herb marinade. There’s something magical about throwing snapper on the grill—it transforms into this smoky, flavorful masterpiece that just sticks with you. I’ll never forget the first time I decided to grill vermilion snapper.
Honestly, I was a little nervous—grilling fish can be tricky, and I didn’t want it to stick or fall apart. But after some trial and error, I figured out the perfect marinade and technique to make it work. Over the years, I’ve tweaked the herb mix and grilling process until it’s just right. Now, it’s a dish my family begs for every summer, bringing a little taste of the Italian countryside right to our backyard.
Ingredient Notes and Substitutes
Vermilion Snapper Fillets: Fresh, wild-caught snapper is best for grilling. Look for fillets with firm, moist flesh and a bright appearance. Ask your fishmonger for pieces with the skin on—it helps hold the fish together on the grill and crisps up beautifully.
Extra Virgin Olive Oil: A must-have in any Italian-inspired marinade. It adds depth and richness to the fish while preventing it from sticking to the grill. Use high-quality cold-pressed olive oil for the best flavor.
Fresh Lemon Juice and Zest: Brightens up the marinade and cuts through the natural richness of the fish. Always use fresh lemons; bottled juice just doesn’t have the same punch.
Garlic (Minced): I prefer fresh garlic cloves minced finely—it gives a bold and authentic flavor. If you’re in a pinch, garlic paste works too but use sparingly.
Italian Herb Blend (Fresh Rosemary, Thyme, and Oregano): This trio brings a classic Italian aroma to the marinade. Chop the herbs finely to release their oils. Fresh herbs make a huge difference, but dried can work in a pinch (just reduce the amount by half).
Crushed Red Pepper Flakes: Optional, but I love a subtle kick of heat. It balances beautifully with the herbs and lemon.
Sea Salt and Freshly Cracked Black Pepper: Essential for seasoning both the marinade and the fish itself. I prefer flaky sea salt for that perfect touch.
Step-by-Step Instructions
Step 1: Prep the Fish
Before anything else, pat the snapper fillets dry with paper towels. This helps the marinade stick better and ensures the fish doesn’t steam on the grill. I like to score the skin lightly with a sharp knife—just a few shallow cuts—so the fish stays flat and doesn’t curl up on the grill.
Step 2: Make the Herb Marinade
In a bowl, whisk together the olive oil, lemon juice, lemon zest, minced garlic, chopped fresh herbs, sea salt, and black pepper. Add the crushed red pepper flakes for a bit of heat if you’re feeling adventurous. If you’re using white wine, pour in a splash—it gives the fish a sophisticated touch.
Step 3: Marinate the Snapper
Place the snapper fillets in a shallow dish or resealable bag. Pour the marinade over the fish, making sure it coats every inch. Cover and refrigerate for 30 minutes, but no longer than an hour. Any longer and the lemon juice might start “cooking” the fish.
Step 4: Preheat the Grill
While the fish marinates, preheat your grill to medium-high heat (about 400°F). Brush the grates with a little olive oil to prevent sticking.
Step 5: Grill the Snapper
Remove the snapper from the marinade, letting any excess drip off. Place the fillets skin-side down on the grill. Grill for about 4-5 minutes on the first side without moving them—that’s the secret to getting that beautiful crispy skin.
Flip carefully with a fish spatula and cook for another 3-4 minutes on the other side, until the flesh is opaque and flakes easily with a fork.
Step 6: Rest the Fish
Transfer the grilled snapper to a platter and let it rest for 2-3 minutes. This step locks in the juices and makes the fish even more tender.
Step 7: Serve with a Final Touch
Drizzle a little more olive oil over the top and finish with a sprinkle of fresh herbs and an extra squeeze of lemon juice. Sometimes I even add a few grilled lemon halves on the side—they look gorgeous and add a smoky citrus hit.
Pro-Tips
- Soak a cedar plank in water for at least an hour before grilling. Place the snapper fillets directly on the plank instead of the grill grates. This method infuses the fish with a subtle, smoky aroma while preventing sticking and overcooking, resulting in a perfectly juicy and flavorful fillet.
- Set up your grill with two heat zones—direct high heat on one side and indirect lower heat on the other. Start grilling the snapper skin-side down over direct heat to get that crispy, charred finish, then move it to the cooler side to finish cooking gently. This technique prevents over-charring and ensures perfectly cooked, flaky fish.
Reheating and Storage Tips
Store the grilled snapper in an airtight container in the refrigerator for up to 2 days. The herb marinade will infuse the fish further, but the grilled texture is best enjoyed fresh.
Freezing is not ideal, as the fish can become dry and lose its charred flavor upon reheating.
To reheat, place the snapper on a baking sheet and warm it in a preheated oven at 275°F (135°C) for about 10 minutes, or until just heated through. Alternatively, you can reheat it in a skillet with a drizzle of olive oil to restore some moisture.
Acqua Pazza Style Vermilion Snapper (Snapper in a Light Italian Broth)
Last but not least in snapper recipes list; Acqua Pazza! The name translates to “crazy water” in Italian, but don’t let that fool you—this dish is anything but chaotic. It’s a symphony of flavors, simple yet perfectly balanced. I first discovered it during a summer spent along the Amalfi Coast, where the fishermen would simmer their catch in a fragrant broth of tomatoes, garlic, and herbs. Inspired, I came home determined to recreate it, and vermilion snapper turned out to be the ideal star. After a few rounds of experimenting, I landed on a broth that’s light, bright, and full of coastal charm.
What I love most is how the dish highlights the snapper’s delicate flavor while enveloping it in a warm, aromatic embrace. It’s like a little taste of the Mediterranean, right in my own kitchen.
Ingredient Notes and Substitutes
Vermilion Snapper Fillets: Fresh, mild, and delicately flavored, vermilion snapper holds up beautifully in the broth without overpowering it. If you can’t find vermilion snapper, go for any firm white fish like branzino or sea bass.
Cherry Tomatoes: These little gems burst with sweetness, balancing the savory broth perfectly. I love using vibrant red and yellow varieties for a colorful touch. If tomatoes aren’t in season, San Marzano canned tomatoes work in a pinch.
Garlic (2-3 cloves, sliced): Just enough to add a mellow warmth to the broth without overwhelming it. Thin slices work better here than minced garlic for a gentler infusion.
Extra Virgin Olive Oil: The backbone of any good Italian dish. Use the best quality you can find for that luscious, fruity finish.
White Wine (½ cup): Adds brightness and complexity to the broth. Choose a dry Italian white wine like Pinot Grigio or Verdicchio—save the good stuff for sipping!
Capers (1 tablespoon, rinsed): They bring a salty tang that wakes up the broth. Rinse them first to mellow out the brininess.
Fresh Basil and Parsley (a handful each): Fresh herbs are essential for that authentic Mediterranean aroma. Basil adds a sweet, peppery note, while parsley brings a fresh, clean finish.
Fish Stock or Light Chicken Broth (2 cups): For depth without heaviness. If you don’t have fish stock, chicken broth will do, but avoid anything too salty.
Step by Step Directions
Step 1: Sear the Snapper
Heat a generous drizzle of extra virgin olive oil in a wide, deep skillet over medium-high heat. Gently lay the snapper fillets in the pan, skin side down if they have skin. Sear for 2-3 minutes until golden and just starting to crisp around the edges. Flip carefully and cook for 1 more minute. Remove and set aside—you just want a light sear here since they’ll finish cooking in the broth.
Pro Tip: Don’t crowd the pan; searing works best with space for the fillets to breathe.
Step 2: Build the Flavor Base
In the same pan, add sliced garlic and sauté until fragrant but not browned—just about 30 seconds. Toss in the cherry tomatoes, letting them blister and release their juices. Stir occasionally, enjoying that heavenly aroma as the tomatoes start to break down.
Step 3: Deglaze with White Wine
Pour in the white wine, scraping up any bits stuck to the bottom of the pan. Let it simmer until the wine reduces by half, intensifying its bright, tangy notes. This step always makes me nostalgic for Italian coastal cafes—the scent of simmering wine mixed with fresh tomatoes takes me back, every time.
Step 4: Add the Broth and Capers
Pour in the fish stock (or chicken broth) and add the rinsed capers. Bring the mixture to a gentle simmer. The broth should look vibrant and slightly thickened from the tomatoes.
Step 5: Return the Snapper to the Pan
Nestle the seared snapper fillets back into the broth, making sure they’re partially submerged but not drowning. Spoon some of the broth over the fillets. Cover and simmer for 5-7 minutes, or until the fish flakes easily with a fork.
Pro Tip: Resist the urge to boil—gentle simmering keeps the fish tender and delicate.
Step 6: Finish with Fresh Herbs
Sprinkle chopped basil and parsley over the snapper and broth. Give the pan a gentle shake to mix the herbs without disturbing the fish. This final flourish makes me feel like an Italian nonna proudly serving up something special. No matter how long I practice, I can not catch up with my nonna of course.
Step 7: Serve and Savor
Carefully transfer the snapper fillets to shallow bowls. Ladle the fragrant broth around the fish, making sure to scoop up those juicy tomatoes and briny capers. Drizzle with a touch more olive oil and garnish with fresh herbs.
Serving Suggestion: Crusty Italian bread is mandatory here—dunking into that broth is pure joy.
Pro-Tips
- For a deeper, umami-rich flavor, toss in a small piece of Parmesan cheese rind while simmering the broth. It infuses the liquid with a savory complexity without overpowering the delicate snapper. Remove the rind before serving for a perfectly balanced dish.
- Before searing the snapper, gently warm the olive oil with strips of lemon or orange zest for 1-2 minutes. This imparts a subtle, fragrant citrus note to the oil, enhancing the brightness of the final dish without the need for additional acidity.
Reheating and Storage Tips
Store the snapper and broth in an airtight container in the refrigerator for up to 2 days. The flavors will meld beautifully, but the fish is best enjoyed fresh to maintain its texture.
Freezing is not recommended, as the fish can become watery and lose its delicate consistency upon thawing.
Reheat gently in a pot over medium heat until the broth is warm and the fish is heated through. Avoid boiling, as it can overcook the fish. Add a splash of water or broth if needed to adjust the consistency.
FAQ: Best Vermilion Snapper Recipes
Can I use a different type of fish if I can’t find vermilion snapper?
What’s the best way to ensure my snapper doesn’t stick to the grill or pan?
Can I prepare any of these dishes ahead of time?
Vermilion Snapper al Forno: Prep the tomato-caper mixture and herb topping a day in advance.
Acqua Pazza: Make the broth ahead and reheat it gently before adding the fish.
Piccata Sauce: The lemon-caper sauce can be made in advance and reheated before serving.
What sides pair well with these snapper dishes?
For Vermilion Snapper al Forno: Serve with roasted potatoes or a simple arugula salad.
For Snapper Piccata: Pair with garlic mashed potatoes or steamed asparagus.
For Grilled Snapper: Try a Mediterranean quinoa salad or grilled vegetables.
For Acqua Pazza: Crusty bread or a light risotto is perfect for soaking up the flavorful broth.


