If there’s one recipe that always takes me back to cozy family dinners by the sea, it’s this simple baked flounder. Growing up, seafood was more than just food in our household—it was a tradition. I vividly remember my mom pulling fresh-caught fish from the local market and turning it into something magical. Everyone loved it every single time. This baked flounder was also a favorite among guests, with its light, flaky texture and delicate flavor, it could win even the most critical foodie.
Over the years, I’ve added my little tweaks to the recipe, just like every other recipe, but of course, the heart of it remains the same: simplicity, freshness, and a whole lot of love, from me to you.
This simple baked flounder recipe is all about letting the fish shine itself. It doesn’t have a long list of elements, just a few basic ingredients—like olive oil, a squeeze of fresh lemon, and a sprinkle of salt and pepper. It’s a dish that comes together effortlessly and delivers incredible flavor every time. I don’t remember any other recipe that I can make so often without getting bored of it.
It’s perfect for those moments when you want something healthy, light, and satisfying but don’t have hours to spend in the kitchen. Trust me, once you taste the buttery, melt-in-your-mouth texture of this flounder, it will earn a permanent spot on your dinner table, just like it has on mine.
Ingredient Notes and Substitutions
Flounder is the heart of this dish, and I can’t stress enough how much I love its delicate, flaky texture. When I’m at the market, I always look for fillets that are fresh and glistening, with a clean scent that reminds me of the sea. You have to follow this routine if you want everyone to lick their fingers. And the most important thing since it’s not easy to find fresh Flounder everywhere year-round, you can use sole or tilapia. Just keep an eye on the cooking time, as thinner fillets may cook a bit faster.
Ah, olive oil—my go-to for almost every dish! It adds a richness that elevates the flounder without overpowering it. I always reach for extra virgin olive oil; it’s worth it for that robust flavor and has a lot of health benefits for every age. If you somehow don’t like it or don’t have it, use melted butter or avocado oil. But they will bring a different character to this baked flounder recipe. Remember, quality matters here!
Lemons—what would we do without them? For me, fresh lemon juice is like a burst of sunshine in the kitchen. It brightens up the flounder beautifully, cutting through its richness and giving it that irresistible zing. I always make it a point to squeeze my lemons right before using them—trust me, there’s just no comparison to bottled juice. If you can’t get your hands on lemons, don’t worry; lime juice works too, although it adds its own unique twist. And if you’re in the mood for something a bit more indulgent, a splash of balsamic vinegar can take the flavor to the next level. That’s my little Italian secret!
Garlic is, hands down, my kitchen MVP! It’s that magical ingredient that turns simple into sensational. I love using fresh garlic cloves—it’s like a ritual, crushing them and letting their bold aroma fill the room. It’s pure heaven! If you’re pressed for time, pre-minced garlic works fine (just use half as much since it’s stronger). And if you’re looking for a milder alternative, shallots are a fantastic choice. They add a subtle sweetness that pairs beautifully with the flounder.
Salt might seem basic, but oh, it’s so important! It’s what brings everything together, making the flavors sing in harmony. I’m partial to sea salt or kosher salt for their clean taste and the way they dissolve so nicely. If you’re trying to cut back on sodium, that’s okay too—just taste as you go. A good salt substitute can work, but don’t skimp too much; you want every bite to be perfectly seasoned.
Freshly cracked black pepper is one of those little touches that makes a big difference. I love the gentle warmth and depth it adds to the dish. It’s like a tiny sprinkle of personality! If you’re out of black pepper, white pepper can do the job, though it has a slightly different, more subtle flavor. And if spice isn’t your thing, no pressure—you can skip it entirely, and the dish will still shine bright with milf flavor.
Parsley and paprika are like the dynamic duo that completes this dish. A sprinkle of fresh parsley adds bright, herby freshness to the flavors, while paprika gives a warm hue and subtle smokiness that’s simply irresistible. I always reach for flat-leaf parsley for its bold, authentic flavor, but fresh dill or cilantro can add their own unique twist if you’re feeling adventurous—just be ready for a shift in character. As for paprika, sweet is my go-to for its mild depth, though smoked paprika brings a bold, sultry vibe if I’m in the mood sometimes. And if you don’t have paprika then chili powder or cayenne can add a little heat—just don’t let it overpower the dish!
How to Bake Flounder? Step by Step Instructions
Step 1: Preheat Your Oven
Preheat your oven to 375°F (190°C). This gives you the perfect temperature for baking flounder to tender perfection without drying it out.
Step 2: Prepare the Baking Dish
Grab a baking dish that’s just the right size for your fillets. If it is too large, the juices will spread too thin. Lightly grease it with olive oil. This will not let your flounder stick while it cooks.
Step 3: Pat Dry the Flounder
Take your flounder fillets and pat them dry with a paper towel. This step is essential for helping the seasonings stick and ensuring the fish bakes evenly.
Step 4: Season the Fillets
Place the fillets in the prepared baking dish. Drizzle a little olive oil over them and rub it in gently with your fingers. Sprinkle sea salt, freshly cracked black pepper, minced garlic, and a dash of paprika for that smoky warmth. Don’t forget to squeeze fresh lemon juice over the top for that signature zing.

Pro-Tips
- For a slight crunch and extra flavor, top the seasoned flounder with a thin layer of breadcrumbs mixed with a touch of Parmesan cheese before baking. This adds texture and a savory finish without overpowering the delicate flavor of the fish.
- If you crowd the fillets too closely, they’ll steam rather than bake, resulting in a less flavorful and less crispy texture. Give the fish some breathing room in the baking dish to allow it to cook evenly and retain its delicate texture.
Step 5: Add Fresh Parsley
Chop up some fresh parsley and sprinkle it over the fillets. This adds a lovely pop of color and freshness that will make everything better.
Step 6: Cover for Moisture
Cover the baking dish with aluminum foil to lock in moisture. This ensures your flounder remains tender and juicy while baking.
Step 7: Bake the Flounder
Place the dish in the preheated oven and bake for 12–15 minutes. The cooking time will depend on the thickness of your fillets, so keep an eye on them. To ensure that the fish is done, it should flake easily with a fork.
Step 8: Finish with a Broil (Optional)
If like a slightly golden finish, remove the foil and broil the flounder for 2–3 minutes. This step is optional but improves the presentation.
Step 9: Plate and Garnish
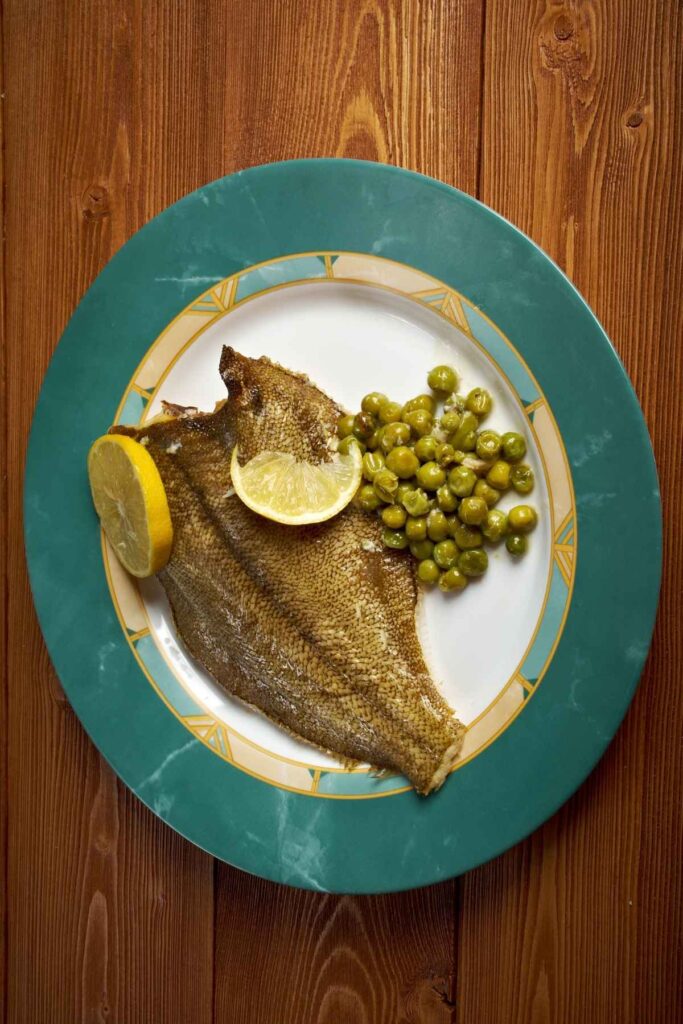
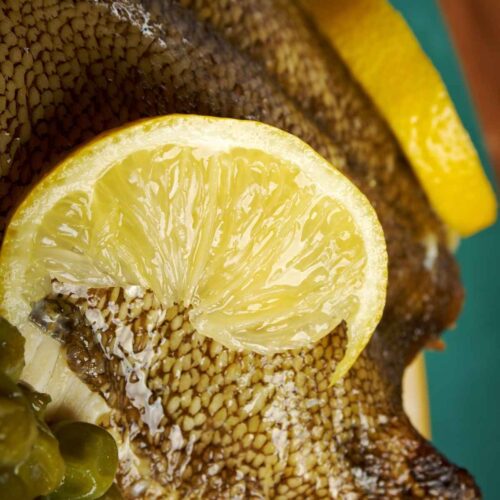
Carefully transfer the flounder to a serving plate. Put a little more olive oil over the top and garnish with a few lemon slices. You can also do a sprig of parsley to make it look like it came from a high-end restaurant.
Serve your baked flounder while it’s hot, paired with your favorite sides—think roasted vegetables or a fresh salad.

How to Store Baked Flounder?
After your baked flounder has cooled to room temperature (don’t leave it out for more than 2 hours to stay on the safe side!), place the fillets in an airtight container or wrap them tightly in plastic wrap. It’s a good idea to keep the fish in the fridge, where it will stay fresh for up to 2 days. If you don’t think you’ll get to it that quickly, you can freeze it, but I’d recommend freezing it within a day or so. Wrap it in foil or plastic wrap, then place it in a freezer bag or airtight container. When you’re ready to eat it, just thaw it in the fridge overnight.
How to Reheat Baked Flounder?
In the Oven: This is my go-to method for reheating baked flounder. Preheat your oven to 350°F (175°C). Place the fish on a baking sheet and cover it loosely with aluminum foil. This will help lock in moisture and prevent the fish from drying out. Bake for about 10 minutes, or until it’s warmed through. If you like a slightly crispy finish, you can remove the foil during the last couple of minutes of baking.
In the Microwave: If you’re in a rush, the microwave can do the job, but it won’t keep the same texture as the oven. To prevent the fish from becoming rubbery, place the flounder on a microwave-safe plate and cover it with a damp paper towel. Heat it in 30-second intervals, flipping the fish in between, until it’s warmed through. Keep in mind that the fish might not be as moist as when it was first baked, but it’ll still taste great.
On the Stovetop: If you’re not into using the oven or microwave, you can reheat the fish in a skillet. Heat a little olive oil in a pan over medium heat, then add the flounder. Cover the skillet with a lid to trap the heat, and cook the fish for about 3 minutes on each side, just until it’s heated through. This method works great for keeping some of that nice, flaky texture.
Checkout other amazing recipes with lemon Real Italian Chicken Francese and Lemon Cream Sauce.
FAQ
Can I use frozen flounder for this recipe?
Absolutely! Just make sure to thaw the fillets completely in the fridge before you start. Frozen fish can work just as well, and it’ll still come out tender and delicious.
How do I know when my flounder is fully cooked?
Flounder is done when it flakes easily with a fork and is opaque all the way through. Keep an eye on it after about 10 minutes in the oven—don’t overcook, or it can dry out!
How do I keep my baked flounder from getting soggy?
The key is to pat the fillets dry before baking and make sure your baking dish isn’t too crowded. If you’re reheating leftovers, use the oven or stovetop to maintain that crisp texture. Trust me, no one likes soggy fish!
How long to bake thin flounder fillets?
Thin flounder fillets typically bake for about 8–10 minutes at 375°F (190°C). Since they’re thin, they cook quickly, so keep an eye on them. The fish is done when it flakes easily with a fork. Just remember, thinner fillets cook faster, so check a bit earlier to avoid overbaking!
Baked Flounder Recipe
Equipment
- Baking dish 9 X 13
- Aluminum foil
- Small bowl for seasoning
- Knife for chopping herbs
Ingredients
- 4 flounder fillets fresh or thawed if frozen
- 2 tbsp olive oil
- 2 cloves garlic minced
- 1 lemon for zest and juice
- 1 tbsp fresh parsley chopped
- 1 tsp paprika
- Sea salt and freshly cracked black pepper to taste
- Lemon slices for garnish optional
Instructions
- Preheat your oven to 375°F (190°C).
- Lightly grease your baking dish with olive oil to prevent sticking.
- Pat the flounder fillets dry with a paper towel. Drizzle with olive oil, then sprinkle with minced garlic, paprika, sea salt, and black pepper. Squeeze fresh lemon juice over the fillets and zest half of the lemon on top.
- Place the seasoned flounder in the prepared baking dish. Cover with aluminum foil and bake for 12–15 minutes, or until the fish flakes easily with a fork.
- Remove the foil, garnish with freshly chopped parsley, and add lemon slices for a pop of color. Serve hot and enjoy!
Notes
- Keep an eye on the fish as it bakes. Flounder is thin and cooks quickly, so be careful not to overbake or it could dry out.
- Feel free to experiment with herbs like thyme or dill, or add a little grated Parmesan for an extra flavor boost.
- Leftovers can be stored in an airtight container in the fridge for up to 2 days. Reheat in the oven for the best results.